Group Project Requirements
For this project, you'll be working in groups. Each person will have a specific role and job - here are the things that need to be done, divide these up among the group members. Jobs are unequal in the work required, so consider that when agreeing on what each person will do. Some bigger jobs might be better shared between a couple of people in the group.
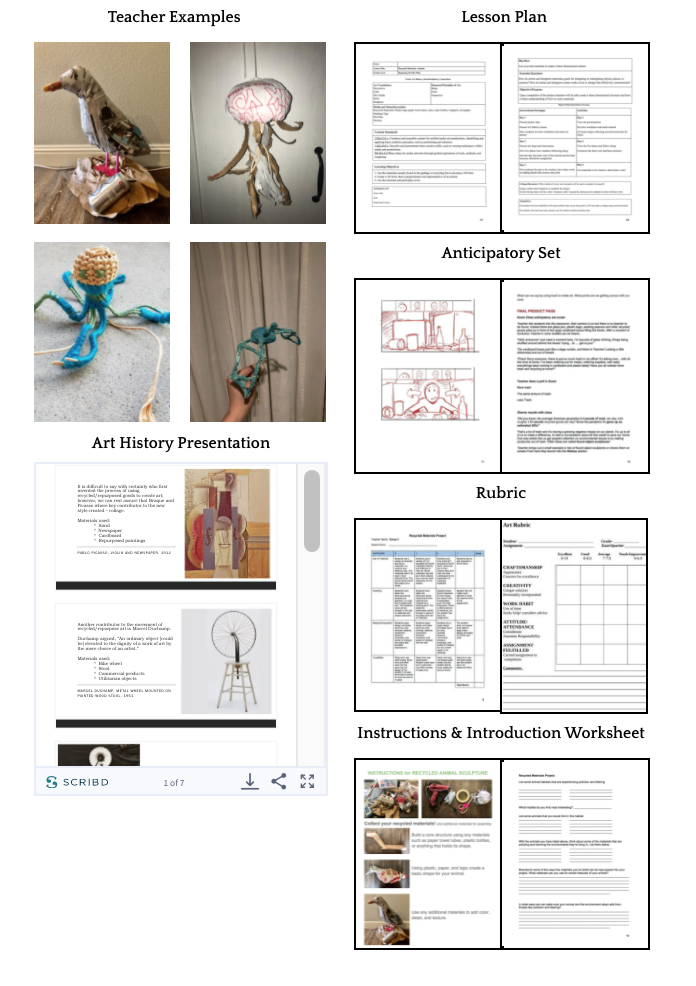
1.Create an art history presentation ppt
2. Create a step by step instruction sheet and/or FAQ
3. Create a grading sheet (rubric, self-eval, quiz, etc)
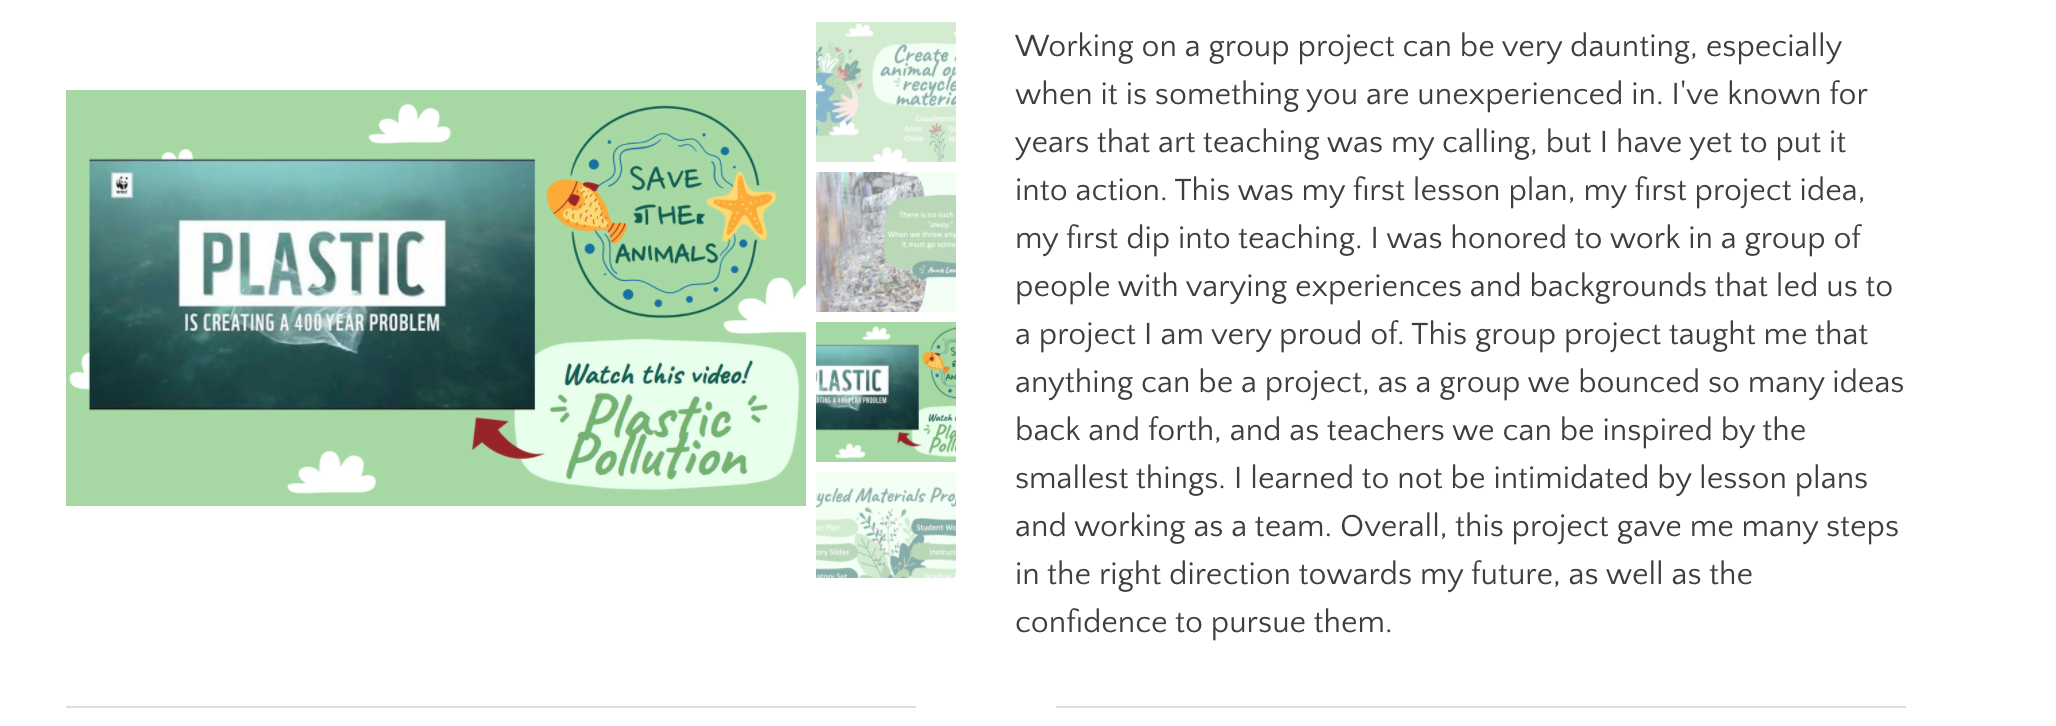
4. Design an "anticipatory set" activity that includes a tech platforms that engages students in the theme/ art skill
5. Complete a lesson plan
6. Make a worksheet that helps students transition/introduction into the activity/ this can also include tech platforms for engagement
7.Create a teacher example
8. Group coordinator: organize the group, take notes and conduct meetings, organize communication
9. Presentation organizer (makes a PPT/presentation that brings all portions together for final presentation)
10.Present in class
In addition, each member of the group will create a teacher sample of the project.
Here's a website with some social issues to get you started: https://hbculifestyle.com/research-paper-topics-50-ideas/
|
Guidelines for the Art History/Thematic presentation Should be 5-10 slides (no more than 10 max) Focus on Theme Use Prezi, Powerpoint, Keynote or any other program you want. *To find out more about the guidelines for the presentation, go to the Presentations Tab Guidelines for Final Presentation For the final document you make for our Group Presentation Day, you may use 5-10 slides. Keep in mind that this final presentation is a tour of your lesson - so you will want to highlight specific aspects of each component. A good example: 1. a slide that goes over the anticipatory set 2. a slide that has 2-3 screenshots of various slides of the art history presentation |
|
For more info - go to the Lesson Plan tab
For copying/pasting State Standards - go here: https://www.cde.ca.gov/be/st/ss/documents/caartsstandards.pdf For a list of actions words that will help you write good objectives for your lesson plan, you can go here Here is a list of Essential Questions to modify:
| ||||
What is an anticipatory set? Visit the Anticipatory set tab
A good anticipatory set can be memorable and can also be multi-sensory. For example, introducing a color theory lesson, perhaps you could start with food coloring and frosting, and some vanilla wafers, and ask students to mix (and then taste!) primary and secondary colors. That's a lot more fun than turning out the lights and starting a powerpoint! Think of ways that you can create a 'hook' to get the students excited about the lesson you're going to be starting.
A good anticipatory set can be memorable and can also be multi-sensory. For example, introducing a color theory lesson, perhaps you could start with food coloring and frosting, and some vanilla wafers, and ask students to mix (and then taste!) primary and secondary colors. That's a lot more fun than turning out the lights and starting a powerpoint! Think of ways that you can create a 'hook' to get the students excited about the lesson you're going to be starting.
|
For the assessment, go to Assessment tab
You have a number of ways you can go. You can take a look at online tools or use some of the tools below: http://rubistar.4teachers.org/Under "Create a Rubric" click on "Art" and you will see some sample rubrics that you can alter. You can also look at those under "Multimedia" if you like the criteria there.
Some other Assessment tools: Example of a self-assessment chart here Example of a checklist here Example of a reflection prompts here Examples of critique/culminating discussion ideas here |
|
For the step-by-step tutorial and lesson plan - go to the Documents tab
on a Mac - click on command/shift/3 to copy the whole desktop, to choose just a segment, click on command/shift/4 and then use the crosshairs to select the area you want to save. This will save as an image onto your desktop.
- Make these a word or pdf document.
- Some hints on how to include images (screen shots):
on a Mac - click on command/shift/3 to copy the whole desktop, to choose just a segment, click on command/shift/4 and then use the crosshairs to select the area you want to save. This will save as an image onto your desktop.
Grading for this group project
For this group project, you will be graded in 3 ways:
1. Your will receive a grade on your "teacher sample" - a finished product that is made according to your lesson plan.
2. You will receive a grade on the individual parts you are responsible for (if you wrote the lesson plan, that grade will go to you).
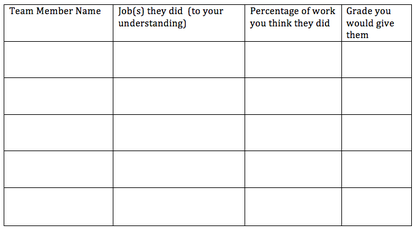
3. You will receive a grade based on your participation in the group. For this, each member of each team will evaluate themselves and everyone else, in an anonymous feedback sheet (shown here). I will collect these and assign a grade that is reflected by the entire group.
1. Your will receive a grade on your "teacher sample" - a finished product that is made according to your lesson plan.
2. You will receive a grade on the individual parts you are responsible for (if you wrote the lesson plan, that grade will go to you).
3. You will receive a grade based on your participation in the group. For this, each member of each team will evaluate themselves and everyone else, in an anonymous feedback sheet (shown here). I will collect these and assign a grade that is reflected by the entire group.
Uploading and completing the components on your own web page
For this project, you will upload ALL parts of the group project on your website - even the parts you didn't do! So you will need to share those different files. You should upload the following:
1. Powerpoint/Prezi/Keynote -- You may have to do this as a pdf file if your images are too large
2. Your lesson plan
3. Your assessment
4. The tutorial and the cheat sheet or FAQ sheet
5. The worksheet
6. Your own teacher sample
Along with all those components, you will need to write a short journal entry discussing this project - you have many things to write about! Your entry may be about what your lesson topic evolved into, maybe it will be about something new you learned, or the experience of working in a cooperative group. Remember also to think about how this might influence your future teaching!
Here's an example of how this should look on your website: