Creating and Burning your CD
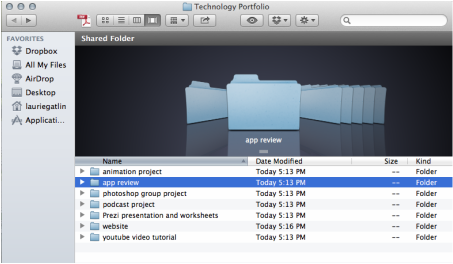
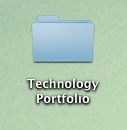
To begin, you will create a directory for your CD that shows all the categories of projects we've done this semester. Create a new folder on your desktop, and call it Technology Portfolio. Open that folder and create new folders for each category. These new folders are:
You will also drag the Website folder you made into this folder.
Into these folders, you will put a copy of your own work for each assignment. In the Animation Project folder, you'll put a finished copy of your animation, in Artist Presentation and Worksheets, you'll put a copy of your PowerPoint/Prezi and your worksheets, etc. These are examples only of YOUR work, not the samples other people in your group made (those would go under 'Website' and a folder there, or create another folder and title it "Samples by other students"). Under "Technology Paper and Articles", put a copy of the research paper you wrote and also put copies of the article/articles that you posted for discussion.
- Animation Project
- Powerpoint (or keynote or Prezi) Presentation and Worksheets
- Photoshop Group Project
- Youtube Video Tutorial
- Podcast Project
- App Review and Articles
- Website
You will also drag the Website folder you made into this folder.
Into these folders, you will put a copy of your own work for each assignment. In the Animation Project folder, you'll put a finished copy of your animation, in Artist Presentation and Worksheets, you'll put a copy of your PowerPoint/Prezi and your worksheets, etc. These are examples only of YOUR work, not the samples other people in your group made (those would go under 'Website' and a folder there, or create another folder and title it "Samples by other students"). Under "Technology Paper and Articles", put a copy of the research paper you wrote and also put copies of the article/articles that you posted for discussion.
Saving your website and files for your Technology Portfolio
The final project you're turning in for this course is a print copy of your technology portfolio, which includes a CD copy of all your files, including your web page. This is a great way to keep a digital copy of all the work you've done in this course, to use in your future teaching.
To save your website, if you are using Firefox:
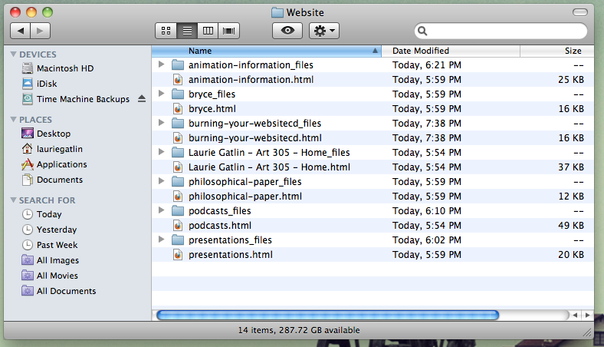
1. Open Firefox and go to your Weebly home page. Choose File>Save Page As> and where it has a box that says "Save As" at the bottom, choose "Web Page, complete." This will save two files, one that says your webpage name - home.html, and it will save a file folder with the same name.
2. Drag these files into your website folder in your Technology Portfolio folder.
3. Go to each page of your website and do the same thing, and put all these pages and folders in your Website folder.
4. So far, you've saved the basic page information for each webpage of your weebly website. Now you need to save the files that you've uploaded. On your desktop folder that you called Website, you need to open the folder and then open the file folder for your home page. If you have any files that have a download link on them on your home page, you will download a copy of those into the corresponding folder. To do this, click on the download link, then drag the file from the download folder and move it into the folder that you've opened. Do this for every file link on that page.
5. If you would like to save all the files/samples that other students have made, you can follow the links on my page and download their files as well. I would suggest creating a folder within your Website folder called "Podcasts" or "Photoshop Projects" or "Powerpoints" so that you can find those files easily.
To save your website, if you are using Safari:
1. Create a folder on your desktop, and name it Website.
2. Open Safari and go to your Weebly home page. Choose File>Save As and where the box that says "format" at the bottom, choose "web archive."
3. Drag this file into your Website folder. Do this for each page of your website.
4. This process only saves the original information on each page, but not the linked files. To do that, you need to create a file folder for each page and place a copy of any linked files into that page. For example, on the page that your podcast is on, you will make a new file folder called "Podcasts" and place your actual podcast file that you download into that file folder. While you are at it, place any other samples that other students have made into that file folder so you can use them as examples as well. you can follow the links on my web page to find the work of other students.
Once you get all the files for all your projects put in the correct folders, you're ready to burn the CD. I have CDs and labels for your CD for you (free).
To save your website, if you are using Firefox:
1. Open Firefox and go to your Weebly home page. Choose File>Save Page As> and where it has a box that says "Save As" at the bottom, choose "Web Page, complete." This will save two files, one that says your webpage name - home.html, and it will save a file folder with the same name.
2. Drag these files into your website folder in your Technology Portfolio folder.
3. Go to each page of your website and do the same thing, and put all these pages and folders in your Website folder.
4. So far, you've saved the basic page information for each webpage of your weebly website. Now you need to save the files that you've uploaded. On your desktop folder that you called Website, you need to open the folder and then open the file folder for your home page. If you have any files that have a download link on them on your home page, you will download a copy of those into the corresponding folder. To do this, click on the download link, then drag the file from the download folder and move it into the folder that you've opened. Do this for every file link on that page.
5. If you would like to save all the files/samples that other students have made, you can follow the links on my page and download their files as well. I would suggest creating a folder within your Website folder called "Podcasts" or "Photoshop Projects" or "Powerpoints" so that you can find those files easily.
To save your website, if you are using Safari:
1. Create a folder on your desktop, and name it Website.
2. Open Safari and go to your Weebly home page. Choose File>Save As and where the box that says "format" at the bottom, choose "web archive."
3. Drag this file into your Website folder. Do this for each page of your website.
4. This process only saves the original information on each page, but not the linked files. To do that, you need to create a file folder for each page and place a copy of any linked files into that page. For example, on the page that your podcast is on, you will make a new file folder called "Podcasts" and place your actual podcast file that you download into that file folder. While you are at it, place any other samples that other students have made into that file folder so you can use them as examples as well. you can follow the links on my web page to find the work of other students.
Once you get all the files for all your projects put in the correct folders, you're ready to burn the CD. I have CDs and labels for your CD for you (free).
Printing out your webpage

You will need to print out every page of your website for your portfolio.
To do this - go to your first page. choose File>print. When the print box comes up, take a look at the "Appearance" choices - be sure to choose "print background colors" and "print background images" so you get the whole page. Otherwise, your page will print without your banner headline or any other graphic on the main pages.
Printing your Presentation
If you used PowerPoint, you can print slides easily enough. Just go to File>Print>under "slides" choose 4 slides per page. click print and you're done.
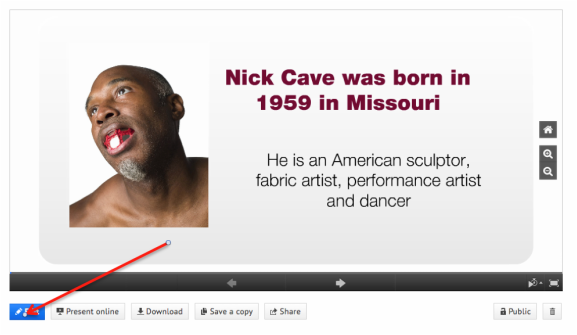
To print out your Prezi, first you need to login and pull up your Prezi. You'll see at the bottom, the Edit Prezi button - click this.
This will bring up your Prezi edit workspace, where you'll print from.
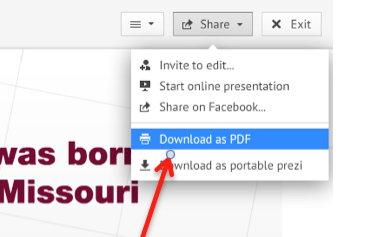
Near the top of the page, you'll see the Share button (below), click on this and choose "Download as PDF."
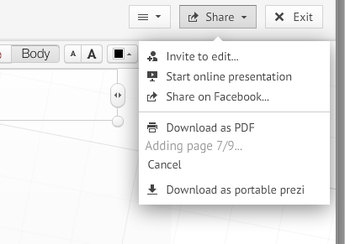
When you click on this, it will add pages to a file (next image), and when it's done, it will say "click to save as PDF". Save that and add it to the correct folder in your tech portfolio.
Now, to save the prezi to your folder, too
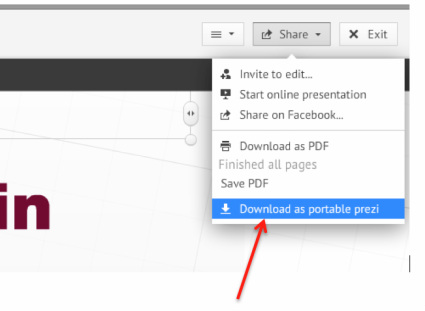
Under that same Share menu, click on 'download as portable prezi.' This will take a few minutes to prepare, then it will download into your download folder.
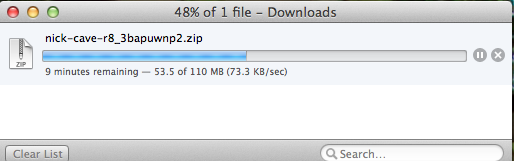
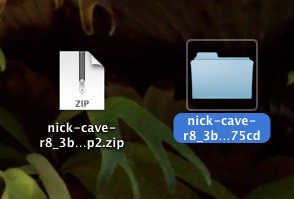
When it is done downloading, it will appear as a .zip file. click on the file to "unpack it", and it will look like the file folder on the right. Drag that into your Tech portfolio, and you've added your prezi to your portfolio. The nice thing is, now you can access it even if you're not online.
To print Prezi slides - multiple slides per page
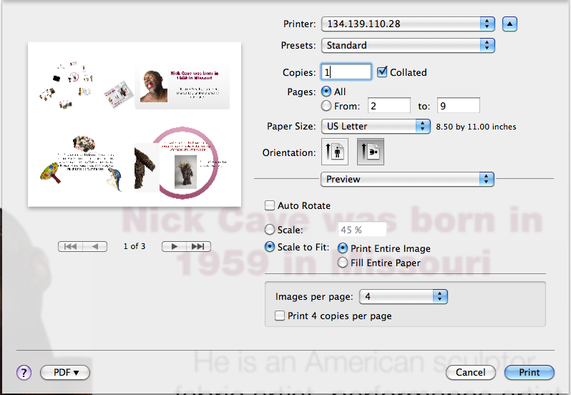
Open your newly saved PDF. Click on file>print, and when the print dialog box comes up, check the following settings:
Scale to fit: print entire image
and
Images per page: 4
If you don't want to print the first page (which is an overview of the whole Prezi - some people's Prezi may not look like much on that first page - mine doesn't! -- then choose:
Pages: from 2 - (whatever your last page number is)
then click on Print and you're done.
Printing out your Technology Portfolio
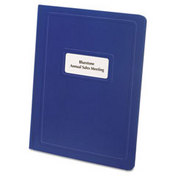
In addition to the CD copy, you will be turning in a print copy of your website and copies of all the projects you've done in class. This will be part of your Bound Portfolio, so it's not just for a grade in this class, but an important part of your professional work. What you will be turning in will be a set of pages in a report cover, and will include the following:
1. Print copies (color if possible, but B/W is OK) of all of your web pages.
2. A copy of your technology research paper.
3. Printouts of your Photoshop project
4. A copy of your Powerpoint or Prezi (these can be printed 4 slides to a page).
5. Copies of any worksheets you've made.
6. Your storyboard (for the animation project).
7. Your step-by-step lesson for Photoshop.
8. A script for your podcast (optional)
9. A CD burned with all the above information.
